On This Page:
For Fall 2017, UMass Amherst Instructional Innovation is conducting a pilot of iClicker Cloud, iClicker's new cloud-based polling software.
Note: The pilot is full and not enrolling additional participants.
iClicker Cloud is an audience response system that works with both the i>clicker 2 remote and base station and devices with access to iClicker REEF polling over a Wi-Fi connection. In order to integrate iClicker Cloud and Moodle, you will need to add an External Tool activity to your Moodle course using a unique URL that you retrieve from iClicker Cloud. This will allow you to sync your class roster with iClicker Cloud and import polling grades into your Moodle gradebook.
Note: Currently, iClicker Cloud can only sync a total score adding together all polling sessions. This function may change in future versions of the software. If you want to have columns for each polling session in your Moodle gradebook, you will need to manually upload grades. For instructions see, Import Student Data to the Moodle Gradebook.
Download iClicker Cloud and Create Your iClicker Cloud Course
![]() Prior to integrating with your Moodle course, you must first download and install iClicker Cloud and then go through the initial steps of creating your iClicker Cloud course. To download iClicker Cloud and for additional set-up instructions, see:
Prior to integrating with your Moodle course, you must first download and install iClicker Cloud and then go through the initial steps of creating your iClicker Cloud course. To download iClicker Cloud and for additional set-up instructions, see:
- iClickerCloud for Mac OS - requires Mac OSX Yosemite (10.10.5) or newer.
- iClicker Cloud for Windows OS - requires Windows 7 with .NET 4.5 or newer.
Retrieve the Unique URL for Your iClicker Cloud Course
After your iClicker Cloud course is created, go to the Course Settings to get the unique URL for your iClicker Cloud course.
- Open iClicker Cloud and navigate to your course by selecting the title of the course in the left column. The course screen will display information about the course.
- In the upper-right, click Edit. The Course Settings pop-up will open.
 (click to enlarge)
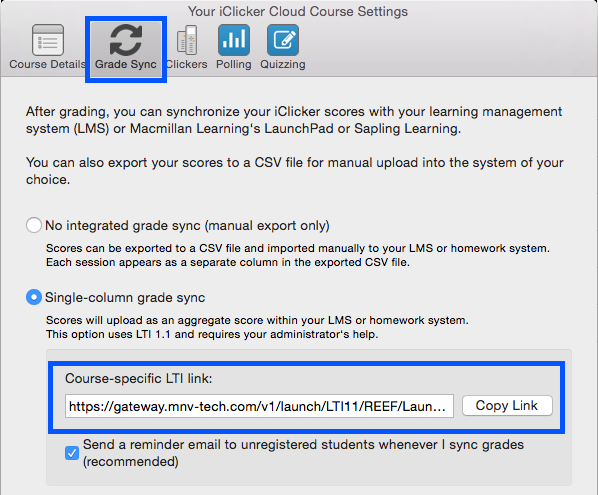
 - Click Grade Sync. The Grade Sync tab will open.
- Select Single-column grade sync to display the unique URL for your course.
- Click Copy Link, or otherwise select copy the URL text. The URL text will be stored in your system clipboard.
 (click to enlarge)

Add the iClicker Cloud Link to Your Moodle Course
After you copy the unique course URL from iClicker Cloud, open your Moodle course to complete the integration by adding a link using the External Tool activity. This action will also create a corresponding column in the Gradebook if you later choose to sync grades from iClicker Cloud.
- On your Moodle course page, click Turn Editing On.
- Locate the section where you want to add the iClicker Cloud link, then click Add an activity or resource. The Add an activity or resource pop-up will open.
- Select External tool, then click Add. The Adding a new external tool page will open.
- In the Activity name field, enter a name for the link as it will appear to students (such as, "iClicker Polling").
- In the Launch/cartridge URL field, paste the copied URL.
- Click Show more..., additional settings will display. Scroll down the page to locate the Launch container drop-down menu. Select New window.
Important: The iClicker Cloud integration does not function correctly unless this setting is changed to New window. - Scroll to the bottom of the page and click Save and return to course. Your course page will open displaying the new link.
- Click the iClicker Cloud link to make sure it is functional. The link should navigate you to the web interface for your iClicker Cloud course.